flyway在非springboot中的配置方法可参考flyway入门使用教程
1.项目依赖
项目中需要的依赖
1
2
3
4
5
6
7
8
9
10
11
12
13
14
15
16
17
18
19
20
21
22
23
24
25
26
27
28
29
30
31
32
33
34
35
36
37
38
39
40
41
42
43
44
45
46
47
48
49
| <?xml version="1.0" encoding="UTF-8"?>
<project xmlns="http://maven.apache.org/POM/4.0.0"
xmlns:xsi="http://www.w3.org/2001/XMLSchema-instance"
xsi:schemaLocation="http://maven.apache.org/POM/4.0.0 http://maven.apache.org/xsd/maven-4.0.0.xsd">
<modelVersion>4.0.0</modelVersion>
<groupId>com.lx</groupId>
<artifactId>flyway</artifactId>
<version>1.0-SNAPSHOT</version>
<parent>
<groupId>org.springframework.boot</groupId>
<artifactId>spring-boot-starter-parent</artifactId>
<version>2.2.5.RELEASE</version>
<relativePath/>
</parent>
<dependencies>
<dependency>
<groupId>mysql</groupId>
<artifactId>mysql-connector-java</artifactId>
<scope>runtime</scope>
</dependency>
<dependency>
<groupId>org.springframework.boot</groupId>
<artifactId>spring-boot-starter-web</artifactId>
</dependency>
<dependency>
<groupId>org.flywaydb</groupId>
<artifactId>flyway-core</artifactId>
<version>6.2.4</version>
</dependency>
<dependency>
<groupId>org.springframework.boot</groupId>
<artifactId>spring-boot-starter-jdbc</artifactId>
</dependency>
</dependencies>
<build>
<plugins>
<plugin>
<groupId>org.springframework.boot</groupId>
<artifactId>spring-boot-maven-plugin</artifactId>
</plugin>
</plugins>
</build>
</project>
|
2.yml配置
1
2
3
4
5
6
7
8
9
10
11
12
13
14
| spring:
datasource:
driver-class-name: com.mysql.jdbc.Driver
url: jdbc:mysql://localhost:3306/test?serverTimezone=Asia/Shanghai&useUnicode=true&characterEncoding=utf8&useSSL=false
username: root
password: root
flyway:
enabled: true
encoding: UTF-8
locations: ['classpath:db/migration']
url: jdbc:mysql://localhost:3306/test?serverTimezone=Asia/Shanghai&useUnicode=true&characterEncoding=utf8&useSSL=false
user: root
password: root
|
更多配置信息可以参考org.springframework.boot.autoconfigure.flyway.FlywayProperties基本和flyway入门使用教程中的配置参数一致,只是不需要在写driver驱动,而是根据链接自动识别,通过springboot引入的spring-jdbc引用数据源
3.编写脚本
参照flyway入门使用教程编写一个数据迁移脚本V1.0__Create_user_table.sql
1
2
3
4
5
6
7
8
9
10
11
12
13
| DROP TABLE IF EXISTS `user`;
CREATE TABLE `user` (
`id` int(11) NOT NULL AUTO_INCREMENT,
`create_time` datetime(0) NULL DEFAULT CURRENT_TIMESTAMP,
`update_time` datetime(0) NULL DEFAULT CURRENT_TIMESTAMP,
`valid` tinyint(2) NOT NULL DEFAULT 0 COMMENT '是否有效 0.有效 1.无效',
`delete_time` datetime(0) NULL DEFAULT NULL,
`name` varchar(255) CHARACTER SET utf8mb4 COLLATE utf8mb4_unicode_ci NOT NULL COMMENT '账号名称',
`password` varchar(255) CHARACTER SET utf8mb4 COLLATE utf8mb4_unicode_ci NOT NULL COMMENT '加密后密码',
`salt` varchar(255) CHARACTER SET utf8mb4 COLLATE utf8mb4_unicode_ci NOT NULL COMMENT '密码盐值',
`admin_role_ids` varchar(255) CHARACTER SET utf8mb4 COLLATE utf8mb4_unicode_ci NOT NULL COMMENT '角色id(多个使用,号隔开)',
PRIMARY KEY (`id`) USING BTREE
) ENGINE = InnoDB AUTO_INCREMENT = 1 CHARACTER SET = utf8mb4 COLLATE = utf8mb4_unicode_ci COMMENT = '用户表' ROW_FORMAT = Compact;
|
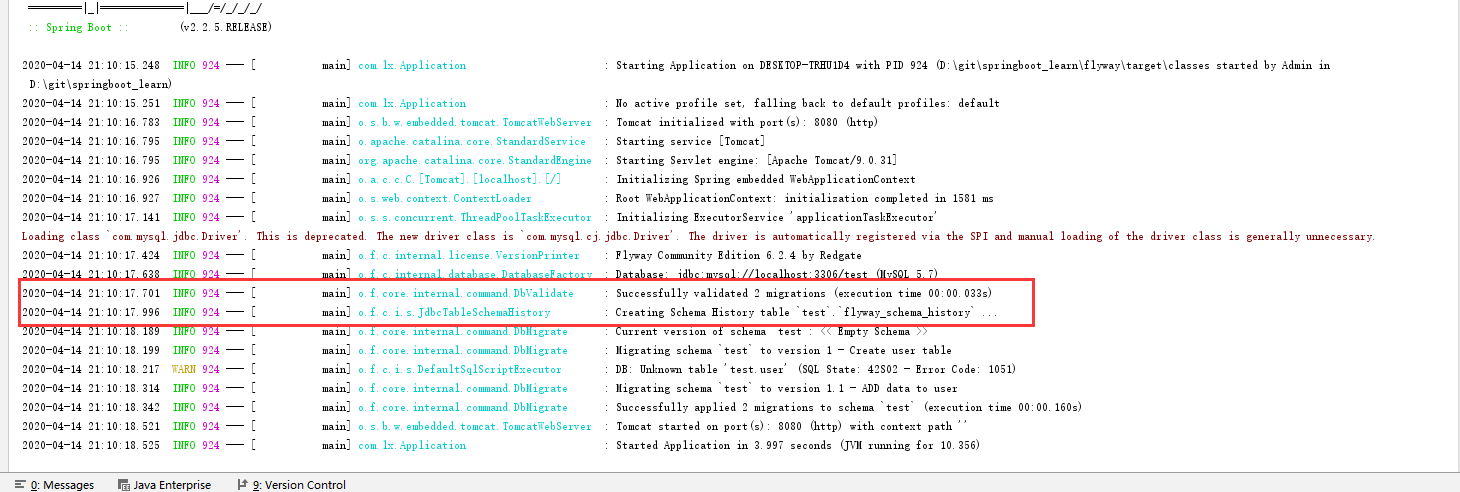
4. 启动项目
到此处为止有关springboot和flyway的配置基本已经配置完毕,直接启动项目,查看控制台,可以看到flyway配置成功,可以正常执行脚本
作者: 只是学习学习
邮箱: fengzxia1000@163.com
原文地址: https://fengzxia.gitee.io/posts/dd4a526.html
版权声明: 商业转载请联系作者获得授权,非商业转载请注明出处。